Introduction
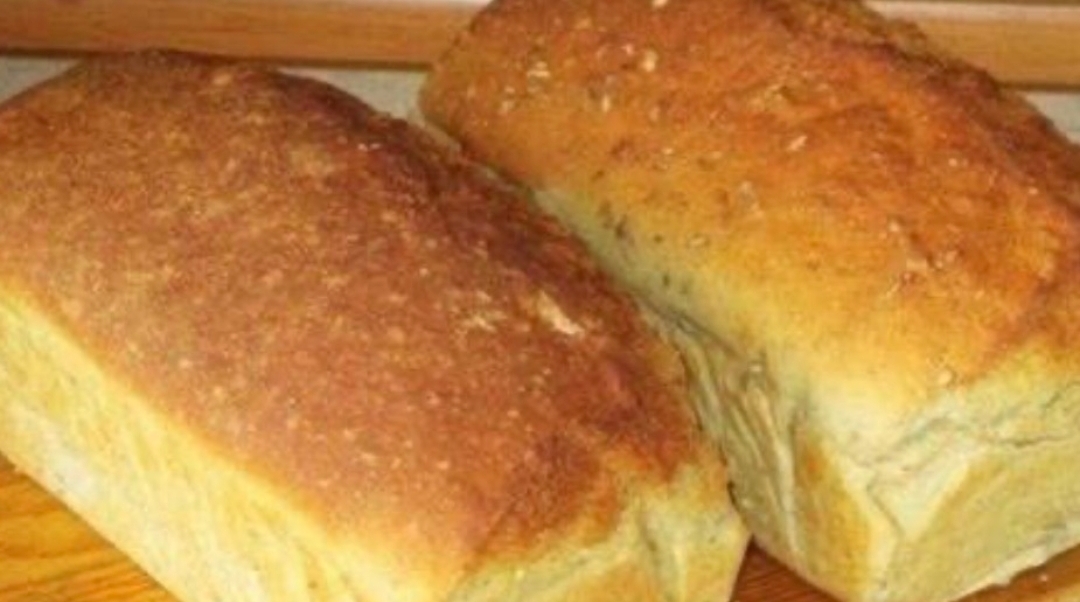
There’s something undeniably magical about the aroma of freshly baked bread wafting through your home. It’s a scent that instantly conjures feelings of comfort, warmth, and nostalgia. This Warm Butter Yeast Bread recipe is designed to bring that very magic into your kitchen, offering a simple yet profoundly satisfying baking experience. Forget complicated techniques or obscure ingredients; this is a classic, straightforward loaf that delivers on all fronts: a golden, inviting crust, a pillowy soft interior, and a rich, buttery flavor that makes it irresistible straight from the oven.
This isn’t just any bread; it’s the kind of bread that becomes a staple, a go-to recipe for everything from a humble slice of toast to the foundation of a gourmet sandwich. Its versatility is part of its charm. Imagine it slathered with homemade jam for breakfast, accompanying a hearty stew for dinner, or simply enjoyed on its own with a generous pat of butter. The process of making it, from the initial mixing of ingredients to the satisfying thud of the finished loaves on the cooling rack, is a journey in itself, culminating in a delicious reward that tastes infinitely better because you made it with your own hands.
Whether you’re a seasoned baker or just dipping your toes into the world of yeast, this Warm Butter Yeast Bread is incredibly forgiving and yields consistently delicious results. We’ve meticulously crafted the instructions to be clear, concise, and easy to follow, ensuring that even first-time bread makers can achieve a beautiful, professional-looking loaf. Prepare to impress yourself and your loved ones with this timeless classic that embodies the true spirit of home baking.
Nutritional Information
Per serving (approximate values for 1/12th of a loaf):
- Calories: 220 kcal
- Protein: 7g
- Carbohydrates: 38g
- Fat: 4g
- Fiber: 2g
- Sodium: 280mg
Ingredients
- 2 ¼ teaspoons (1 standard packet) active dry yeast
- 1 cup warm water (105-115°F / 40-46°C)
- ½ cup warm milk (105-115°F / 40-46°C)
- ¼ cup granulated sugar
- 1 teaspoon salt
- ¼ cup unsalted butter, melted and slightly cooled, plus more for greasing pans
- 4 ½ to 5 cups all-purpose flour, divided, plus more for dusting
Instructions
- Activate the Yeast: In a large mixing bowl (or the bowl of a stand mixer), combine the warm water, warm milk, and granulated sugar. Sprinkle the active dry yeast over the top. Stir gently and let it sit for 5-10 minutes, or until the mixture becomes foamy. This indicates that your yeast is active and ready to work. If it doesn’t foam, your yeast may be old, or the water temperature was incorrect, and you should start over with fresh yeast.
- Combine Wet Ingredients: Once the yeast is foamy, add the melted and slightly cooled butter and the salt to the yeast mixture. Stir well to combine all the wet ingredients evenly.
- Add Flour Gradually: Begin adding the flour, one cup at a time, mixing well after each addition. If using a stand mixer, use the dough hook attachment on low speed. If mixing by hand, use a sturdy wooden spoon. After about 3 cups of flour, the dough will start to come together and become shaggy.
- Knead the Dough: Continue adding flour gradually until the dough pulls away from the sides of the bowl and forms a soft, slightly sticky ball. You may not need all 5 cups of flour; the exact amount can vary based on humidity and flour brand. Turn the dough out onto a lightly floured surface. Knead the dough for 8-10 minutes by hand, or 6-8 minutes with a stand mixer on medium-low speed, until it is smooth, elastic, and no longer sticky. To test if it’s ready, perform the “windowpane test”: pinch off a small piece of dough and gently stretch it. If you can stretch it thin enough to see light through it without tearing, it’s properly kneaded.
- First Rise (Bulk Fermentation): Lightly grease a large clean bowl with butter or cooking spray. Place the kneaded dough into the greased bowl, turning it once to coat the top. Cover the bowl tightly with plastic wrap or a clean kitchen towel. Place the bowl in a warm, draft-free place (such as a slightly warmed oven that’s turned off, or a sunny spot) and let it rise for 1 to 1 ½ hours, or until it has doubled in size.
- Prepare Loaf Pans: While the dough is rising, grease two standard 9×5-inch loaf pans generously with butter or cooking spray.
- Punch Down and Divide: Once the dough has doubled, gently punch it down to release the air. Turn the dough out onto a lightly floured surface. Divide the dough into two equal pieces.
- Shape the Loaves: For each piece of dough, gently flatten it into a rectangle. Fold the two long sides towards the center, overlapping slightly, then roll the dough tightly from one short end to the other to form a compact loaf. Pinch the seam closed at the bottom. Place each shaped loaf seam-side down into the prepared loaf pans.
- Second Rise (Proofing): Cover the loaf pans loosely with plastic wrap or a clean kitchen towel. Return them to a warm, draft-free place and let them rise for another 45-60 minutes, or until the dough has risen about 1 inch above the rim of the pans and looks puffy. During the last 15 minutes of this rise, preheat your oven to 375°F (190°C).
- Bake the Bread: Place the risen loaves into the preheated oven. Bake for 30-40 minutes, or until the tops are golden brown and the internal temperature reaches 200-210°F (93-99°C) when measured with an instant-read thermometer. If the tops are browning too quickly, you can loosely tent them with aluminum foil.
- Cool: Once baked, immediately remove the loaves from the pans and place them on a wire rack to cool completely. This is crucial to prevent the bottom of the loaves from becoming soggy. Allow the bread to cool for at least 30-60 minutes before slicing for the best texture and flavor.
Cooking Tips and Variations
Achieving the perfect loaf of Warm Butter Yeast Bread is a rewarding experience, and a few key tips can elevate your baking to new heights. First, always ensure your yeast is fresh and active. The “foaming” step where you combine it with warm water and sugar is your quality control. If it doesn’t foam, your bread won’t rise, so it’s best to start over. The temperature of your liquids is also critical; too cold, and the yeast won’t activate; too hot, and you’ll kill it. Aim for a comfortable bathwater temperature, around 105-115°F (40-46°C).
Kneading is another cornerstone of yeast bread. Whether by hand or with a stand mixer, proper kneading develops the gluten, which gives the bread its structure and chewy texture. Don’t be afraid to add a little more flour if the dough is too sticky, or a tiny bit of water if it’s too dry, but do so sparingly. The dough should be smooth, elastic, and resilient. During the first rise, finding a warm, draft-free spot is crucial. A turned-off oven with the light on, or a sunny windowsill, can provide the ideal environment for the dough to double in size. Be patient; rushing the rise can result in dense bread.
When shaping your loaves, aim for a tight, uniform cylinder. This helps create an even rise and a consistent crumb. For the second rise, allow the shaped loaves to become visibly puffy, reaching just above the rim of the pan. Over-proofing can lead to a collapsed loaf, while under-proofing results in a dense crumb. Finally, once your bread is out of the oven, resist the urge to slice into it immediately. Cooling completely on a wire rack allows the internal structure to set and prevents a gummy texture. It also allows the flavors to fully develop.
Variations:
- Herb & Garlic: Before the second rise, brush the tops of the loaves with melted garlic butter and sprinkle with dried rosemary, thyme, or Italian seasoning for a savory twist.
- Cheese Lovers: Fold in ½ cup shredded cheddar or Parmesan cheese during the last few minutes of kneading for a cheesy delight.
- Sweet Cinnamon Swirl: After flattening the dough into a rectangle before rolling, spread a mixture of 2 tablespoons melted butter, 2 tablespoons brown sugar, and 1 teaspoon cinnamon. Roll up tightly to create a beautiful swirl.
- Whole Wheat Blend: For a heartier loaf, substitute 1-2 cups of all-purpose flour with whole wheat flour. You might need a little extra liquid as whole wheat flour absorbs more.
- Seed Topping: Before baking, brush the tops of the proofed loaves with an egg wash (1 egg beaten with 1 tablespoon water) and sprinkle with sesame seeds, poppy seeds, or flax seeds for added texture and nutrition.
- Milk Bread: For an even softer, richer crumb, replace all the water with milk. This will create a bread that is incredibly tender and moist.
Storage and Reheating
Proper storage is key to keeping your Warm Butter Yeast Bread fresh and delicious for as long as possible. Once the bread has completely cooled to room temperature (this is critical to prevent moisture buildup and sogginess), you have a few options for storage. For short-term storage, wrap the cooled loaves tightly in plastic wrap or aluminum foil, or place them in an airtight bread box or container. Stored at room temperature, the bread will stay fresh and soft for 2-3 days. Avoid refrigerating homemade bread, as the cool temperatures can actually accelerate staling, making the bread dry and crumbly much faster than at room temperature.
If you won’t be consuming the entire loaf within a few days, freezing is an excellent option to extend its shelf life for several weeks. To freeze, ensure the bread is completely cool. You can freeze it whole, or slice it first for convenience. Wrap the bread tightly in plastic wrap, then an additional layer of aluminum foil, or place it in a freezer-safe bag, pressing out as much air as possible. Frozen bread can last for up to 2-3 months. When you’re ready to enjoy it, simply thaw the bread at room temperature. If sliced, you can pop individual slices directly into a toaster.
Reheating your Warm Butter Yeast Bread can bring it back to its freshly baked glory. For a whole loaf, preheat your oven to 350°F (175°C). Lightly sprinkle the loaf with water (just a few drops) or wrap it loosely in foil, then heat for 10-15 minutes, or until warmed through and the crust is slightly crisp again. For individual slices, a toaster or toaster oven works perfectly. You can also warm slices in a pan on the stovetop over medium-low heat, with or without a little butter, until lightly toasted and warm. Microwaving is generally not recommended for reheating bread, as it can make it chewy and quickly dry it out, though a very short burst (10-15 seconds) might warm it slightly without too much detriment if you’re in a pinch.
Frequently Asked Questions
What makes this bread “butter yeast bread” specifically?
This bread earns its name from the generous amount of butter incorporated into the dough, which contributes significantly to its rich flavor, incredibly soft and tender crumb, and golden crust. The yeast is the leavening agent responsible for the bread’s rise and light, airy texture, distinguishing it from quick breads.
My dough isn’t rising. What went wrong?
The most common reasons for dough not rising are inactive yeast, or the water/milk temperature being too hot or too cold when activating the yeast. Ensure your yeast is fresh (check the expiration date) and that your liquids are between 105-115°F (40-46°C). Also, make sure your dough is in a warm, draft-free environment during the rising periods.
Can I make this bread without a stand mixer?
Absolutely! This recipe can be easily made by hand. The kneading process will take a bit longer, typically 8-10 minutes of vigorous kneading, but it’s a great workout and very satisfying. Just be sure to develop the gluten fully until the dough is smooth and elastic.
How can I tell if my bread is fully baked?
There are a few indicators. The crust should be a deep golden brown. When you tap the bottom of the loaf, it should sound hollow. For the most accurate measure, an instant-read thermometer inserted into the center of the loaf should register between 200-210°F (93-99°C). If it’s done, immediately remove it from the pan to cool on a wire rack.